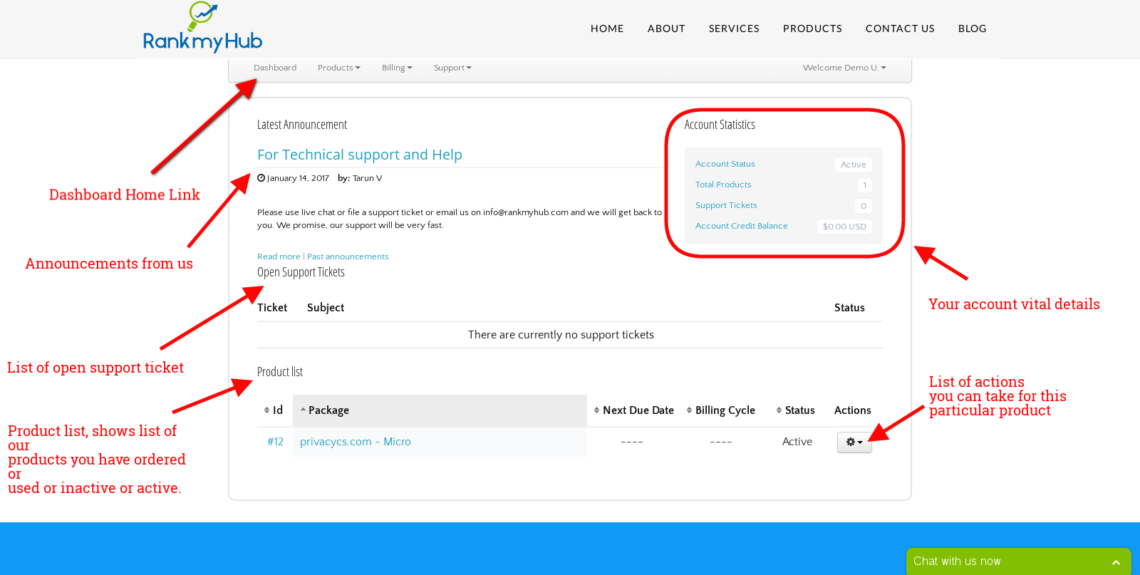
In this article, we will walk through the web hosting customer dashboard on rankmyhub.
Step 1: To access your account dashboard, you have to log in, to you web hosting portal.
Step 2: Once you are at the login page, you have to enter the following details.
Email id: Enter the email id, that you had used when you created an account with us.
Password: Enter the password, that you had used when you created the account and press or click SIGN IN button on the page.
Step 3: You will log into your web hosting dashboard. The Dashboard will look like the screenshot below.
Now, in the customer portal, you can see the internal menu bar and your profile list. The menu items are as following:
Dashboard: This is a home page or home link in the customer portal.
Products: This is a menu where you can see the list of sub menu items like Products list, Order new services.
Billing: This menu deals with the payment information, pending invoices, paid invoices, and payment method updating. You will see the list of sub menu items as My invoices and Edit Payment Method.
Support: This menu deals with support tickets and knowledge base ( now knowledge base shifted to the main website for ease of access). You will see the list of sub menu items as My tickets, Search knowledge base and Submit a request.
On the right side of the portal, you can see the profile menu. It is used for changing your profile information, adding alternative accounts for notifications, viewing account notes ( added by our support or billing or technical team member ) and to log off from this customer portal.
The menu items are as following:
Edit Profile, Alternate Accounts, Account Notes and Log off.
In the account dashboard or home page, you can see important details of your account as seen in the screenshot above.
